You are reading this article because you want to exclude one or more pages from being cached by LiteSpeed Cache in WordPress.
LiteSpeed Cache, How to Exclude Pages from Cache
By default, LiteSpeed Cache attempts to cache as many pages as possible in order to maximise website performance and loading speed.
However, there are situations where certain pages should not be cached.
Common Pages That Should NOT Be Cached
- Custom forms
- Dynamic user dashboards
- Membership/account pages
- Checkout/cart pages
- Pages showing live or personalised data
- Pages under active development/testing
In this guide we will show you two ways to prevent a page from being cached.
Two Available Methods
Simple Method
Best for excluding individual pages directly from the frontend while viewing the page.
- Quick and easy
- Ideal for non-technical users
- No need to remember page URLs
Advanced Method
Allows manual exclusion of URLs and paths inside LiteSpeed settings.
- Useful for developers
- Supports multiple exclusions
- Better for larger websites
Simple Method (Recommended)
- Log in to WordPress
- Open the page you do not want cached on the frontend of the website
- In the top WordPress toolbar, locate the LiteSpeed options
- Mark the page as: Non-Cacheable
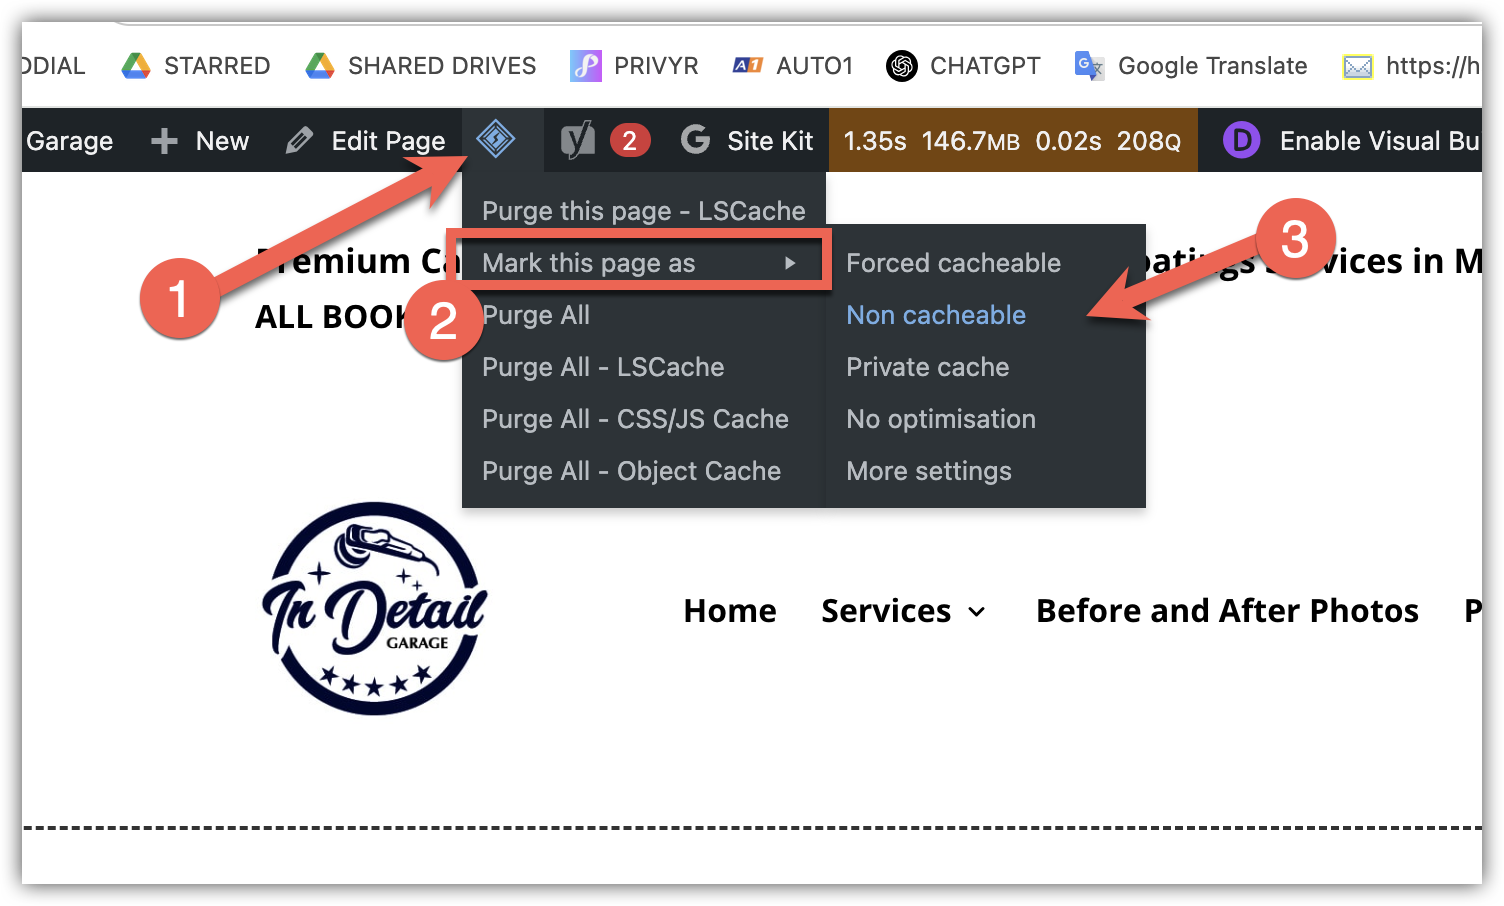
Marking a page as non-cacheable directly from the frontend
Advanced Method
- Log in to WordPress
- Navigate to: LiteSpeed Cache > Cache > Exclude
- Locate the field called: Do Not Cache URLs or Exclude Settings
- Add the URLs or paths you do not want cached
Example Exclusions
/members-area/
/checkout/
/live-dashboard/
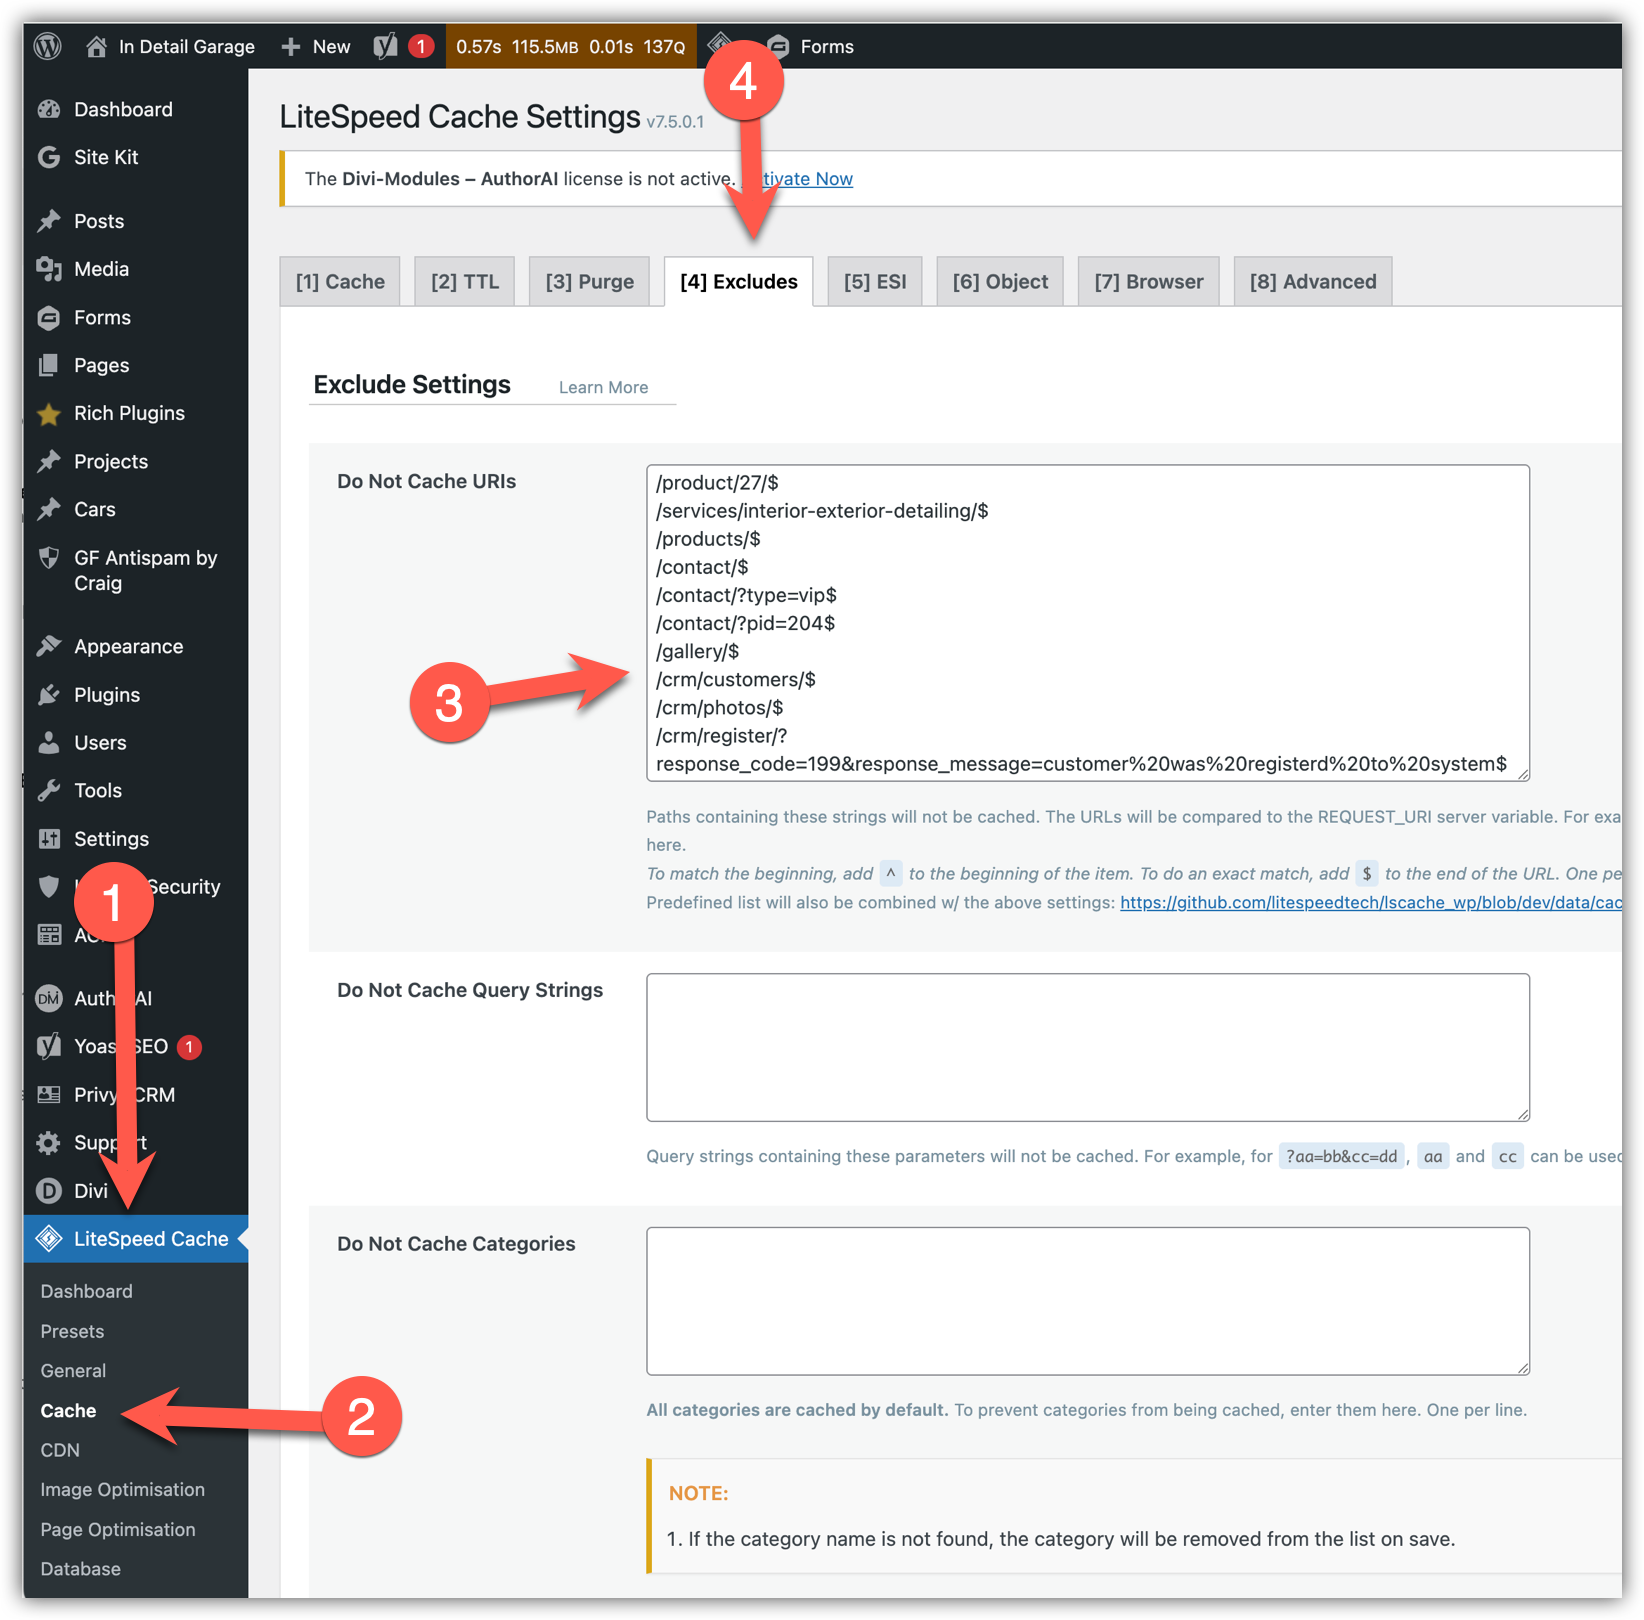
Advanced cache exclusion settings in LiteSpeed Cache
Important Notes
Avoid Excessive Exclusions
Excluding too many pages from cache can reduce website performance and increase server load.
Purge Cache After Changes
After adding exclusions, it is recommended to purge LiteSpeed Cache so the new rules apply immediately.
Tip: Most standard WooCommerce cart, checkout, and account pages are automatically excluded from cache by LiteSpeed Cache by default.
